
Those Dirty, Rotten Beams - Page 2
 |
|
|
Beam cap culprit
Another culprit that leads to beam damage is the installation of improper beam caps—those thin, galvanized metal coverings that are meant to protect the beam from water exposure.
“If homeowners or an inexperienced handyman put on a metal beam cap in the wrong style, it can actually accelerate the rot process,” Larson says. “I have metal caps especially made for these beams, so that water is always diverted away when it hits the top.”
Dry rot in Eichler atrium beams should be addressed early. There, dry rot that extends into a roof beam can spread into the adjacent framing and cause the structure to collapse under the weight of the roof. Damaged beams in a carport are also serious because they involve load-bearing support.
Beams are designed like a human backbone; each beam, or vertebrae, has a specific purpose. If you modify or change the beam, you are compromising the integrity of the structure.
“I have not seen a catastrophic failure, but sometimes I find myself blocking and bracing a beam when I get to a house, because they look like they could be really bad,” Larson says. “Once water gets into a beam, it can run through it, and run into the house and down the wall.”
 |
Repair vs. replacement
Experts say you can repair up to 20 percent of a beam’s structure before replacement becomes the only viable option.
For a do-it-yourselfer to repair surface damage (up to one-half inch deep), use a spackling paste before sanding, priming, and repainting with a quality exterior paint.
For deeper damage, use an epoxy filler (such as Restor-it), available at better paint and hardware stores for around $25. “It’s extremely nasty to work with, but a really good product,” Larson says.
Sometimes, however, by the time you begin to see warning signs, some level of beam replacement might become your only option. If you’re lucky, only a top or end of the beam will need replacement, but extensive damage will require the entire beam to be removed and replaced.
But our experts agree: you can’t just go to Home Depot or a common lumberyard and pick up headers; you need aged lumber that won’t twist, warp, or split.
“You can’t buy beams off the shelf,” says Michael Spehar, owner of the Building Company, who works on Eichlers out of his San Jose base. “You need to use an architectural-grade beam that has less chance of warping or twisting. If you use new wood, it will shrink back within a year, and it will pull away from the house.”
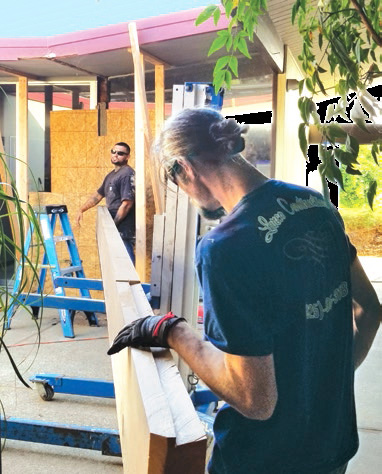 |
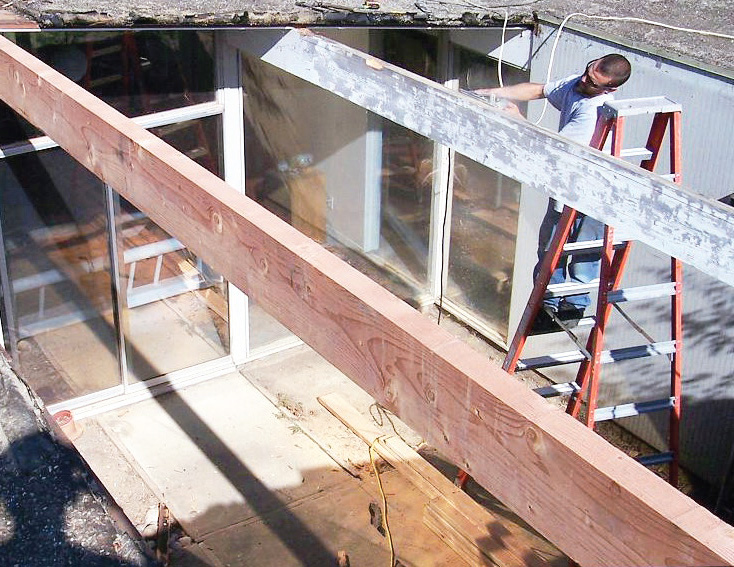
Eight-step process
Beam replacement should be left to the pros, particularly when beams are structural. Plus, there’s nothing easy or safe about working on ladders with saws and other heavy power tools.
Gomes says he uses an eight-step process to replace beams:
1) Before any cuts are made to remove damaged material, he sands all the paint off that area and marks the portion to be removed.
2) Braces the beam where needed to ensure that nothing collapses.
3) Slowly makes the cuts (not an easy task on a ladder).
4) Matches the removed material to an aged material of the same type of wood, such as Douglas fir.
5) Carefully measures and cuts the new material.
6) Makes sure pieces match up perfectly and makes adjustments as needed.
7) Seals the cut area, and then attaches the new beam to the old. Fills and sands as needed.
8) Installs a custom galvanized metal cap, and primes and paints beam and cap.
“It’s a lot of work to make everything look like the original, but I can usually get one-and-one-half to two beams done in one day,” Gomes says.
 |
Judy Buchholz, a Streng owner in Davis, hired Gomes several years ago to repair and replace several rotting beams. “We wanted to maintain the architectural integrity of the home, and Joe was so knowledgeable, and instructed us on what needed to be done,” Buchholz says.
“Working with a crew of one or two men, he completed the job meticulously, added a protective cap to each beam, and painted [the beams] to look like the original. We couldn’t be happier.”
To prepare and paint yourself, carefully prep the surface by scraping and sanding. Fill in cracks with a quality paint-able caulk, apply two coats of premium primer, and then top with two coats of quality exterior paint.
For his work on Strengs, Gomes’ usual fee is $600-700 per header to repair them. Larson says Eichler beams cost around $3,700 to replace, but cost can vary depending on the project’s complexity.